Hi all, as announced a new public tutorial .... late immense
the blame for this delay is due not to the undersigned, who also worked
and taking pictures already last week, but the platform blogger, that seems to have tired of posting photos and ... did strike! I am damned soul to do this post for the entire week,
least I hope it's worth the wait and I am presenting the creation you enjoy ....
this is the clutch that we will achieve ....
(the picture scared I know, but realize it is really super easy)
start?
This clutch requires two pieces of cloth 35 x 50 cm (pouch) the blame for this delay is due not to the undersigned, who also worked
and taking pictures already last week, but the platform blogger,
 that seems to have tired of posting photos and ... did strike! I am damned soul to do this post for the entire week,
 least I hope it's worth the wait and I am presenting the creation you enjoy ....
this is the clutch that we will achieve ....
(the picture scared I know, but realize it is really super easy)
start?
take the stuff that we like and that is fairly consistent (if you like instead to use a lightweight cotton stretch just on the back of each piece a bit of adhesive dressing table!) 
1 piece 35 x 40 cm (inner liner)  ed un pezzo di stoffa in fantasia diversa sempre di 35 x 40 cm (tasche interne)
(queste misure possono variare a seconda del vostro gusto!) :o) stiriamo a metà il pezzo 35 x 40 in fantasia diversa
e posizioniamolo a metà della stoffa base (35 x 50) facendo attenzione che i bordi vivi
siano posizionati al centro.
facciamo una cucitura al centro della striscia in senso verticale.
stiriamo a metà anche l'altro pezzo di stoffa 35 x 40
e posizioniamolo a metà della stoffa base (35 x 50) facendo attenzione che i bordi vivi
siano posizionati al centro.
facciamo una cucitura al centro della striscia in senso verticale.
stiriamo a metà anche l'altro pezzo di stoffa 35 x 40
 posizioniamolo esattamente sopra l'altro che abbiamo già cucito. pieghiamo ora a metà la base (35 x 50) right against right
 sew on both sides, being careful to take all layers of fabric with the seam, if you are inexperienced
 help you with a basting.
 once sewed the two sides, open corners with the seam in the center front and a seam pass
 (This section is intended to give the thickness)
for this piece and also "smooth" corners 
 :o) a questo punto avremo due quasi-pochette
che andremo ad infilare una nell'altra rovescio contro rovescio,

 :o) a questo punto avremo due quasi-pochette
 che andremo ad infilare una nell'altra rovescio contro rovescio,
 pieghiamo i bordi all'interno facendoli combaciare...
 a questo punto dovremmo avere una cosa del genere... :oD
 se si presenta così anche la vostra possiamo proseguire....
 ultimo passo la chiusura... io odio le hinges, so I used velcro to close the
 but if you like it .... you can change the zip!
then cut a piece of Velcro 34 cm (above and below)
and hook up with a seam part of the velcro to one side ....

and the other party on the other side .....
and here it is our masterpiece!! : o) 

and this is done ..... 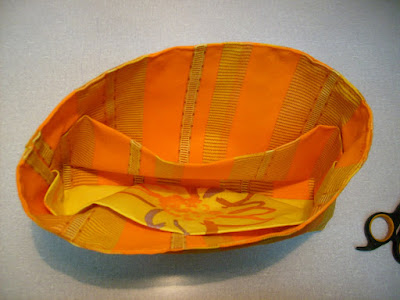 Message for Anna:
I received your mail, but I can not answer you.
I am preparing the tutorial that interests you,
and will be online soon .... allowing bloggers ...
: o (
kisses kisses
 Message for Anna:
 I received your mail, but I can not answer you.
I am preparing the tutorial that interests you,
and will be online soon .... allowing bloggers ...
: o (
kisses kisses


0 comments:
Post a Comment